As we continue to push environments to the cloud, running powershell as a scheduled task on a server is quickly going to become outdated and inefficient. Azure Functions in Microsoft’s Azure Cloud are the next iteration of running scheduled or triggered powershell jobs in your customer environments. Azure Functions allow you to connect to all of the customers you manage using the secure application model in a headless fashion and the best part of it all is that it is a serverless architecture. This means you don’t really have to worry about cost. In fact the consumption based plan allows for 1 million free executions of a function per month. In this article, I am going to show you how to create an Azure Function and connect to familiar powershell modules such as Exchange, Partner Center, MSOnline, and AzureAD across all of you customers. These functions can be scheduled as timed jobs that run periodically or you could run them on demand via a trigger.
Prerequisites
- Azure Subscription in your Active Directory => You will need an Active Azure Subscription to set up the Function App Service
- Decent Proficiency with Powershell => I can say that if you are not really familiar with powershell you probably won’t have a good time. I think you could follow my blog here step for step but the real power comes from you adding your own scripts to the service. I will be giving samples as well but you need to know basic troubleshooting if things come up (as they always do)
- Tokens and GUIDs from the Secure Application Model => I showed you how to generate these tokens in a previous post here. The secure application model allows you to connect to all the customers you manage in Partner Center
Steps
1. Go to Portal.Azure.com and Sign in as a Global Admin
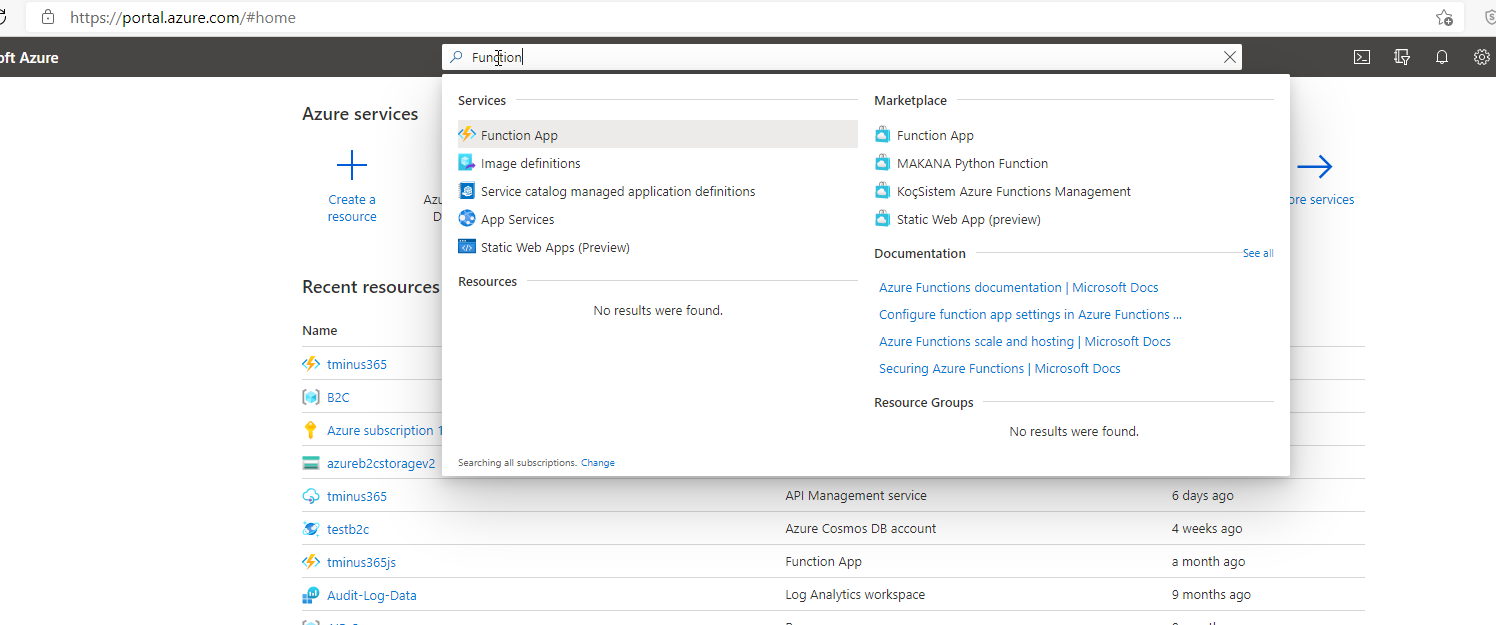
2. Search for Function and Select Function App
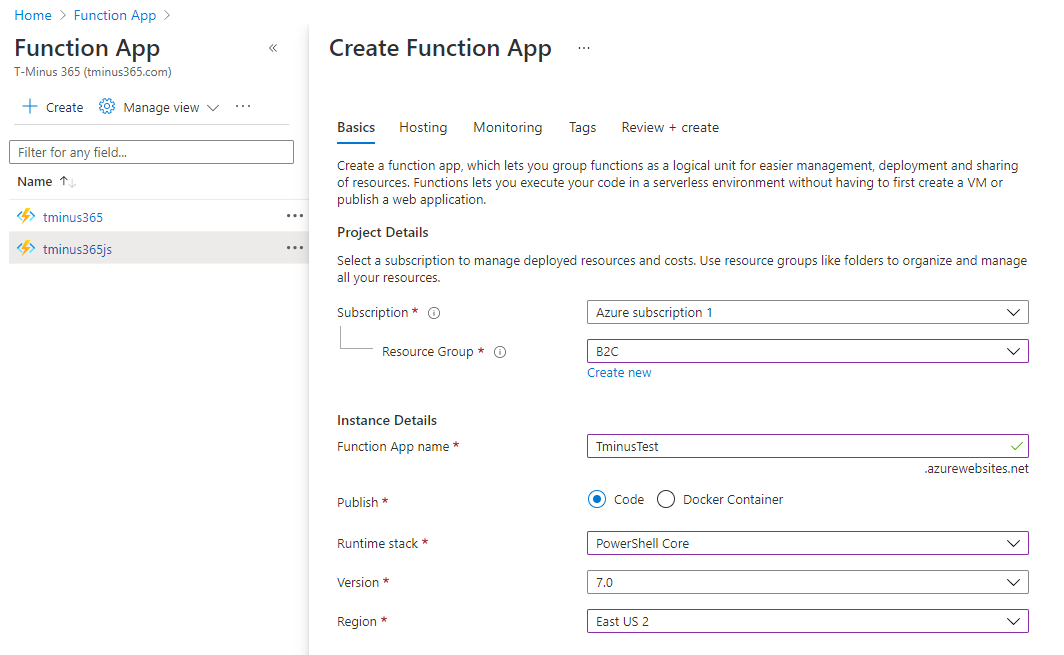
3. Select your active subscription
4. Select and Active Resource Group or Create a new one
5. Name the App (can’t be changed later)
6. Select Powershell Core for the Runtime Stack
7. Select the Region closest to you
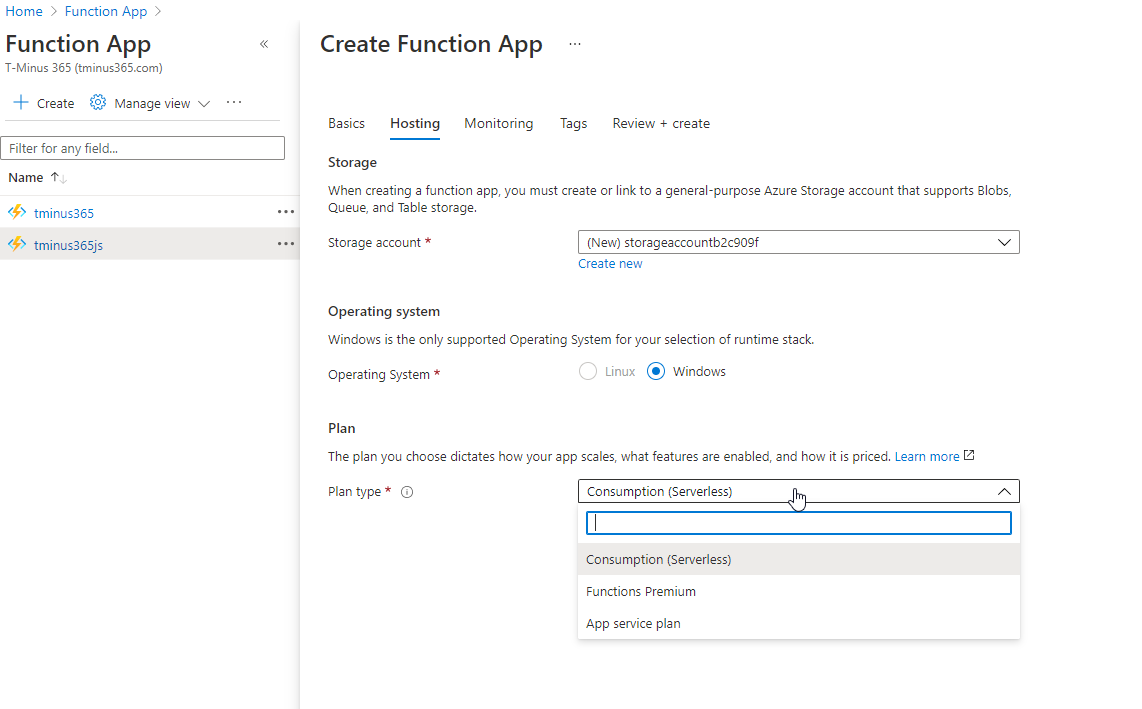
8. Chose to Create a new storage account or link to an existing in your RG
9. For the plan type, leave the default of Consumption (Serverless). Click Next(Monitoring)
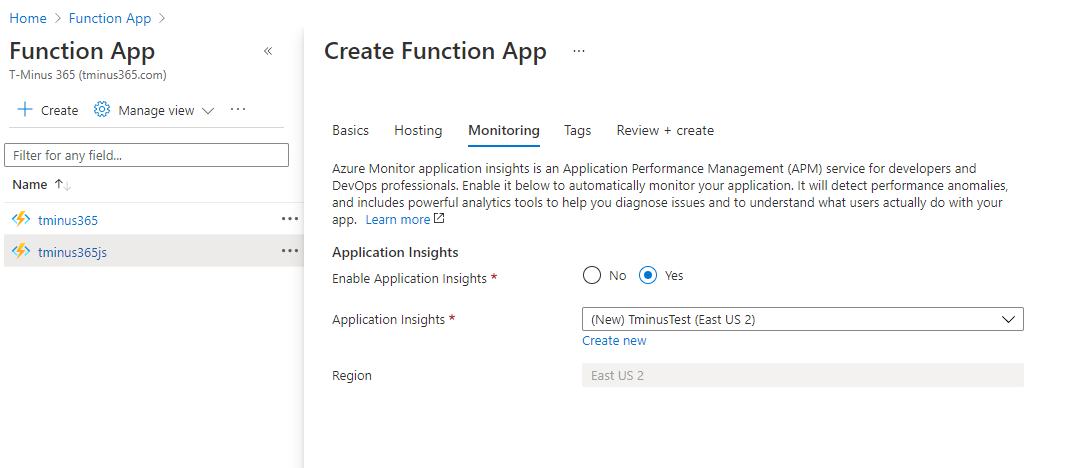
Application Insights is optional. I prefer to have it turned off personally but it is up to you. In this example I left it on.
10. Review your set up and click Create
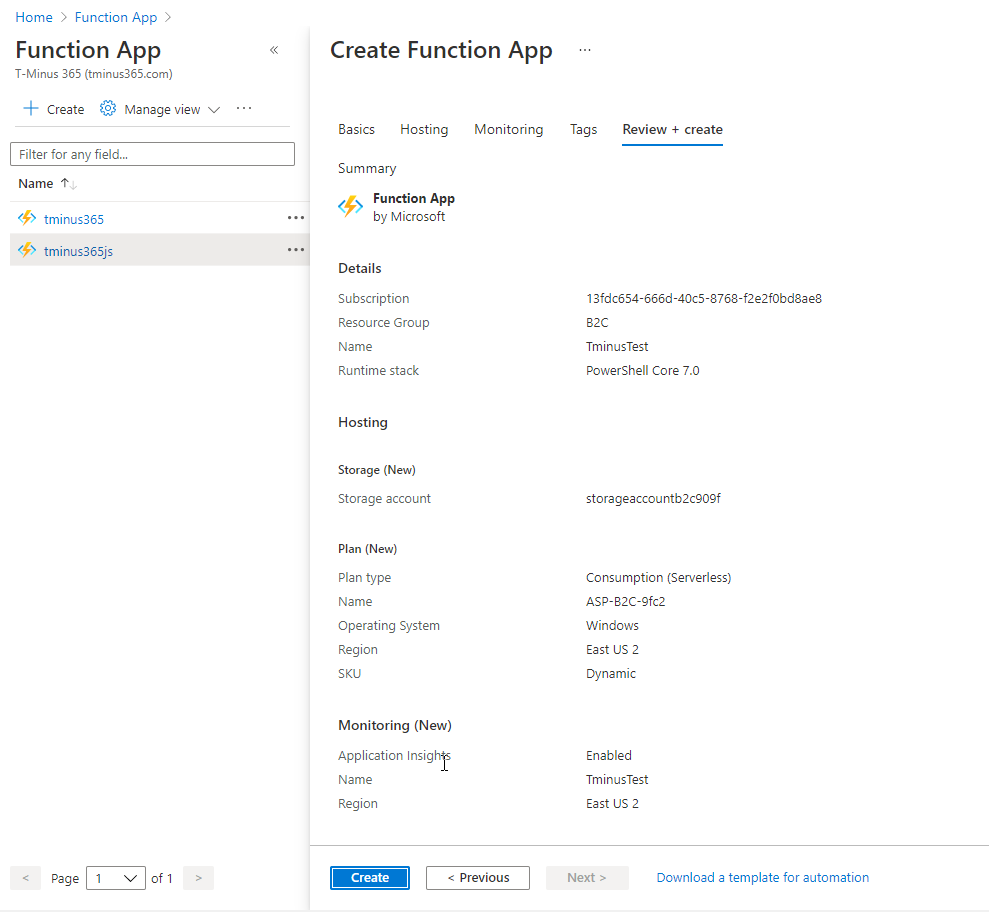
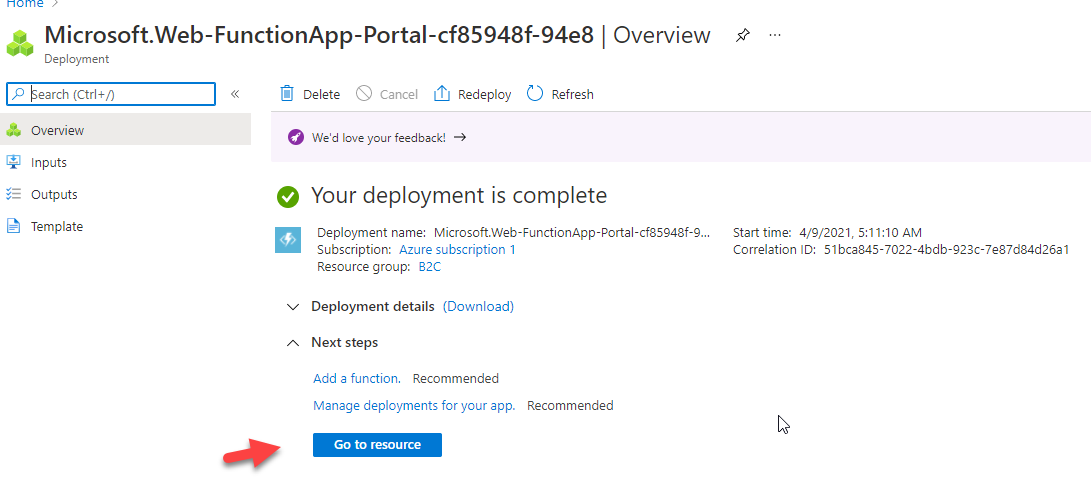
11. This will take a few minutes to deploy. Once ready, click on Go to Resource
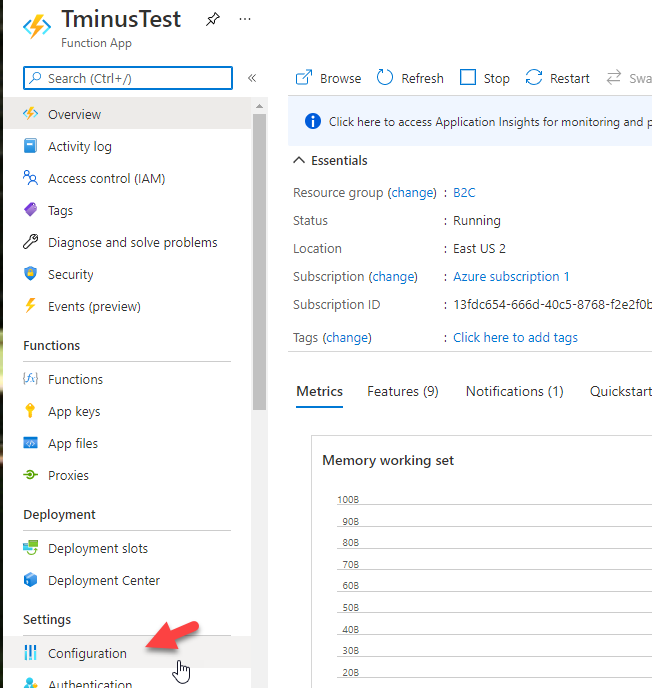
12. From the main page, click Configuration
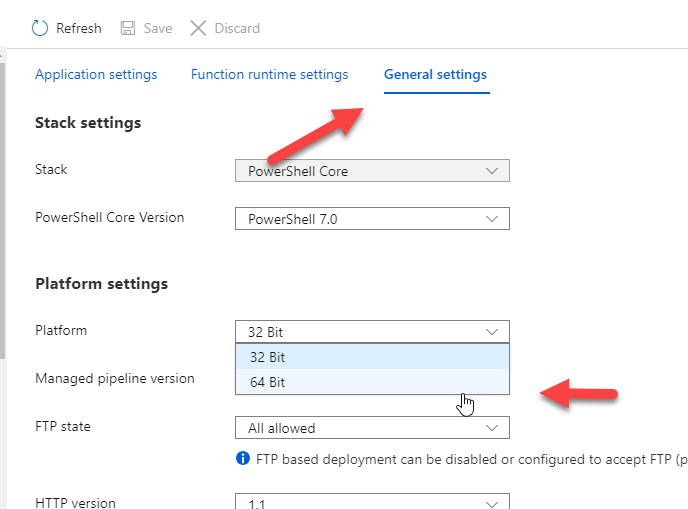
13. Click on General Settings and Change the Platform from 32 bit to 64 bit. Click Save at the top of the page.
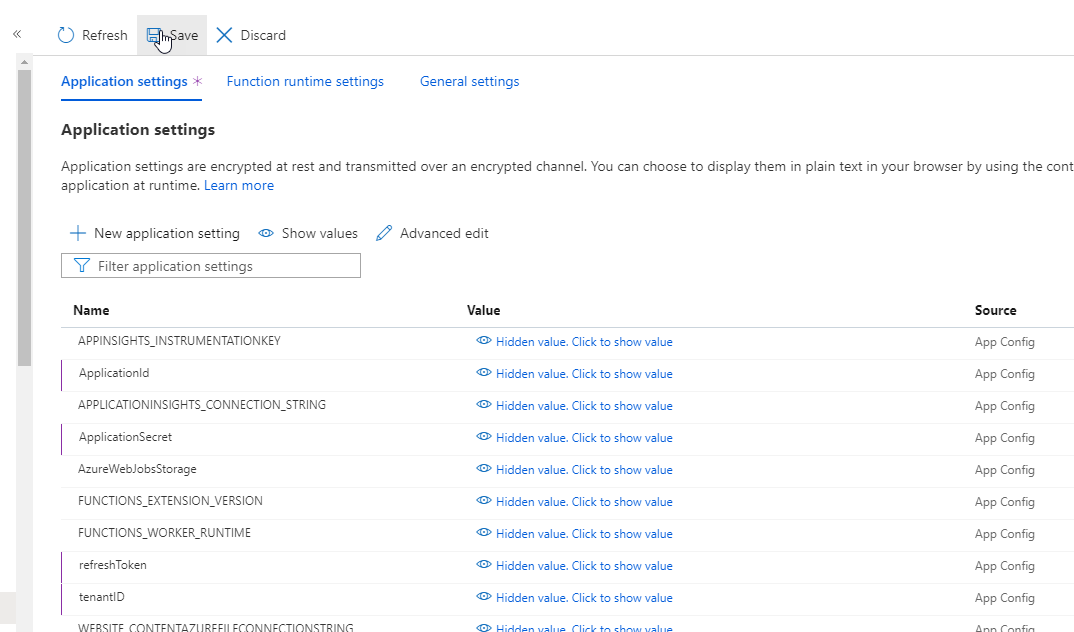
14. Click Back on the Application settings tab. Here is where we are going to enter the Secure Application model tokens and GUIDs we got from running the script from the previous blog post.
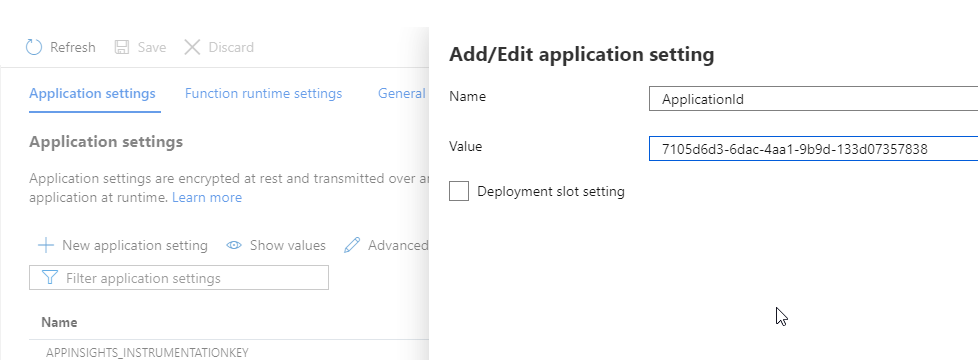
You will add a new application setting for each of the secrets in the output of the script.

15. When you are done be sure to click Save
16. Now we are going to click on the App Files icon on the left nav bar and then we will select the Requirements.psd1 file from the dropdown
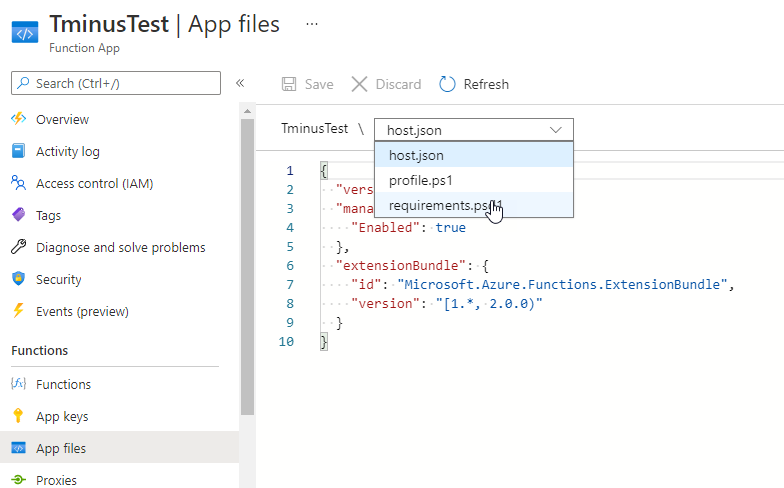
17. This step is highly important. This is essentially how you define what modules you want loaded into the directory so you can import them into your scripts at runtime. If you do not perform this step the script will fail, telling you that it does not recognize the modules. In the example below I have added the PartnerCenter module and the MSonline module. The value of these modules defines the version number and the * basically says, keep this up to date with new versions that come out. When you have added your modules, click Save.

18. Now that we have our modules as dependencies, we are going to add a new function. Click on Functions and then + Add

19. Here you see we can define a trigger. In the examples I am going to show, we will be using a timer trigger that runs much like a scheduled task. The other I like to use is the HTTP trigger because it lets me run scripts on demand and also lets me pass in variables as parameters so its more dynamic than a static script. An example of this is calling a script that passes in a particular customer TenantID and/or UPNs to run a powershell script just against that user on demand. For this example, click on Timer Trigger. The schedule field takes in a CRON value. Take a look at the following support article to see what kind of schedule you would like to run. In this example, I am running this script everyday at 930.

20. After you click on add, Click on Code + Test. A boiler plate script is shown in the run.ps1 file. What you will want to do here is simply leave the param(Timer) and then include the following text shown to import the modules that we put as our dependencies files. Click on save after these lines are entered.

21. After you have the file saved, click on Test/Run. A new window will open on the right. Do not modify anything on that page and simply click Run. The script will connect and you will see the message below, telling you that the managed dependency is downloading.

22. Now that our modules are loaded into our directory, we can add our variables from the Application Settings that we added earlier. In the example below, ensure that the names you entered as the Key value are the same that you see after the $ENV: These have to match. Also ensure that the $ENV has the colon at the end of it, not just a . (This one had me losing my mind for about an hour with errors I was getting but it was only a typo)

23. From here I would try to run a very simple script to ensure that all of your env variables are working correctly. Here is an example script that you could run that will output the names of all of the customers you manage in Partner Center. Simply copy and paste this script into the function and click save. Click Test/Run run.
param($Timer)

Import-Module MsOnline -UseWindowsPowershell
Import-Module PartnerCenter -UseWindowsPowershell

$ApplicationId = $ENV:ApplicationID
$ApplicationSecret = $ENV:ApplicationSecret
$secPas = $ApplicationSecret| ConvertTo-SecureString -AsPlainText -Force
$tenantID = $ENV:TenantID
$refreshToken = $ENV:refreshToken
$upn = $ENV:upn
$ExchangeRefreshToken = $ENV:ExchangeRefreshToken
$credential = New-Object System.Management.Automation.PSCredential($ApplicationId, $secPas)

###Connect to your Own Partner Center to get a list of customers/tenantIDs #########
$aadGraphToken = New-PartnerAccessToken -ApplicationId $ApplicationId -Credential $credential -RefreshToken $refreshToken -Scopes 'https://graph.windows.net/.default' -ServicePrincipal -Tenant $tenantID
$graphToken = New-PartnerAccessToken -ApplicationId $ApplicationId -Credential $credential -RefreshToken $refreshToken -Scopes 'https://graph.microsoft.com/.default' -ServicePrincipal -Tenant $tenantID

Connect-MsolService -AdGraphAccessToken $aadGraphToken.AccessToken -MsGraphAccessToken $graphToken.AccessToken

$customers = Get-MsolPartnerContract -All

Write-Host "Found $($customers.Count) customers." -ForegroundColor DarkGreen


foreach ($customer in $customers) {

    Write-Host "I found $($customer.Name)" -ForegroundColor Green

}
When you run this, you show see something like the following in the logs. I blurred the customer names here but each one you manage should be listed here.

If you get errors, it is likely that either:
1. Your ENV variables are incorrect (You have a trailing space in the value in the Application Settings, You spelled the name wrong, you don’t have the proper syntax of “$ENV:” for each variable.)
2. Permissions have not been granted to the App you created using Kelvin’s script for the secure Application model. Click here for a support article on how to do this in Azure AD. The name of the App is whatever you called in in the DisplayName parameter.
3. Your dependencies (modules) never installed correctly. For this one I would try to run the Import-Module lines again on their own. Here is an example of that error:

23. From here, if you get the commands to go through you are really good to start scripting things you would want to do across your customer environments. Here are some examples of jobs you may want to run:
1. Periodically running a script that ensures that all mailboxes are audit log enabled.
2. Periodically removing licenses from shared mailbox accounts.(I’ll be showing an example of this soon.)
3. Periodically updating documentation in IT Glue (I’ll be showing an example of this soon.)
Final Thoughts
I think Azure Functions are extremely powerful and will be the future of running scheduled tasks alongside of Intune. There are some things I have learned through hours of testing that I wanted to share here just so that you are aware:
- The service itself is running on Powershell Core 7.0. This means that scripts you are able to run remotely with version 5.1 may not be capabitble with this version. A good example of this is the MSOnline Cmdelts. These are considered v1 cmdelts where as the AzureAD module is considered v2. For this reason there are some objects in the MSOnline modules that you won’t be able to extract in the sense of their properties and there are some cmdlets that might not work at all. For this reason, I encourage to write scripts using the AzureAD module and cmdlets
- Unless you are using VS Code, your debugging options are extremely limited in the GUI. I would recommend using the ISE locally on your script first to debug everything and then putting it up into the function to see if it is compatible there are well. Download Powershell 7.0 locally for the best experience.
- I really like to use a bunch of Write-Host in the script when I am testing to see the output of variables in the log when I click on Test/Run. This can tell me if there are variables returning with empty values which can pinpoint where I need to modify my script
- Connect-AzureAD does not support the delegated admin token rights today unlike Connect-MsOnline. This means if you are running AzureAD cmdlets against all of your customers, you would need to connect to these customers individually in a forEach loop. You will see this in my script for removing licenses from Shared Mailboxes.
- I don’t know how often this would come up but the maximum runtime for a function in the consumption model is 10 minutes. These scripts usually run in a matter of a couple of minutes tops when you loop through your customers but if you have 500+ customers the function may timeout. If this happens you will want to add some stop-resume logic to your script to avoid any timeout errors.
